Resources for artists
Painting lights - Using values and layering with watercolors

One of the main qualities of watercolors is that by varying the amount of water and pigment that we use, the result can be very transparent or even opaque.
To practice transparency and color value in my book ‘DIY Watercolor Christmas’, I proposed a project called ‘Layering Circles’ (Photo 1). A wet on dry exercise where we can observe this quality while layering circles.
By using the same principle we can create the effect of light in a fun and simple way. I exemplify this with a string of lights (Photo 2), but I didn’t go trough the process. So I thought it will be handy to create a step-by-step tutorial.
 |
 |
| Layering Circles | String of lights |
The following tutorial is for a yellow light, but you can create lights in many colours. The key is always to work from light to dark, so don’t be afraid of using enough water to achieve this. You can only use one color if you want, although I propose using two for a more interesting effect.
I also created a quick video that can be found as a reel on mi IG account where I added a blue back ground just for fun. It is a more experimental approach where I also sparkle some salt for an additional texture.
For this project you will need:
- Watercolor paint
- Watercolor paper
- Pencil or watercolor pencil
- Brushes
Color palette
Lemon Yellow and Pyrole Orange
Step-by-Step
 |
 |
| 1. Paint a translucid yellow circle and let dry. | 2. Draw the light bulb using a watercolor pencil. |
 |
 |
| 3. Make a watery mix of Lemon Yellow and Pyrole Orange, and paint a second circle, slightly smaller than the first. Go around the light bulb in step 3 and 4, we want to reserve the original color. Allow to dry. | 4. Add more orange to your mix and paint a third smaller circle. |
 |
 |
| 5. Repeat this step if you wish with smaller circles, I painted a total of five circles. | 6. Leave the light bulb as is or add more color if you wish. I added more yellow and orange. Using a gray watercolor pencil, draw the base of the light bulb. |
 |
 |
| 7. I drew some lines to resemble the idea of a strain. | 8. Try it using different colors! |
Video / Reel (TO BE UPLOADED TO MY IG ACCOUNT SOON)
For the group of lights with a blue background in the video I used:
Lemon Yellow, Cadmium Yellow Light, Pyrole Orange, Cobalt Teal, Ultramarine Blue, Cobalt Blue, Indigo.
NOTE: This tutorial is based in the projects of the book ‘DIY Watercolor Christmas’ by Ingrid Sanchez, AKA CreativeIngrid. Publisher: David & Charles (13 July 2021).* With thanks to Cass Art (UK) for providing the watercolors for testing them.
DIY: Christmas Ornaments - Paint on glass using Watercolor Ground

It’s that time of the year when we start thinking about Christmas decorations, and because I am all about handmade, I want to share one of my favorite projects from my book ‘DIY Watercolor Christmas’: the galaxy ornaments.
I love this project because it is also a cool way to experiment with Watercolor Ground, an absorbent primer that allows us to paint on many different surfaces such as paper, glass, wood, metal, fabric and plastic.
It is also interesting to observe how some texture techniques react differently than they do on paper. This is a fun and slightly messy activity that can be done with children.
 |
 |
Additional tips for applying watercolour ground
Some brands recommend sanding non-absorbent surfaces first, but I prefer to apply a coat of white acrylic paint instead.
After applying a coat of white acrylic and allowing it to dry, for best results you will need to apply two coats of watercolor ground, allowing for drying time in between coats. Once the second coat has been applied, allow it to cure for at least 24 hours before beginning to paint with your watercolors.
For this project you will need:
- Watercolor paint
- Glass ornaments
- White acrylic
- Watercolor ground
- Table salt
- Rubbing alcohol
- Brushes
- Toothbrush or brush with stiff bristles
- Spray bottle (optional)
Color palette
I use a mix of Prussian Blue, Indigo, Payne’s Grey, Ultramarine Blue, Cinnabar Red. To give each bauble its own personality, change the dominant blue for each one. Indigo and Payne’s Grey will result in an intense shade, and by adding a little Cinnabar Red to the mix we get a lovely purple.
NOTE: This video tutorial is based in the ‘Galaxy Ornament’ project of the book ‘DIY Watercolor Christmas’ by Ingrid Sanchez, AKA CreativeIngrid. Publisher : David & Charles (13 July 2021).
My experience writing ‘DIY Watercolor Christmas’
The dream of writing a book

|
|
Painting a Christmas Wreath for the project 'Traditional Wreath'. This is also the artwork used on the cover of 'DIY Watercolor Christmas', Ingrid Sanchez 2021. |
Writing a book in pandemic times
 |
 |
| Trying to capture the step-by-step process |
Painting glass baubles with a galaxy texture |
And I did it!
 |
 |
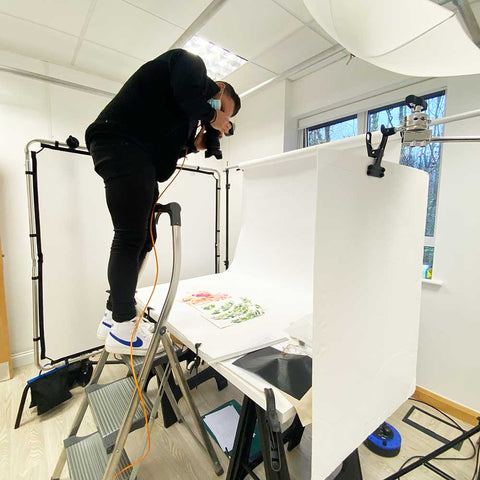
| Photography session at David & Charles offices | Taking photos of my art supplies |
 |
 |
| Books for the pre-release |
Holding the first copy! |
I hope this book speaks to you and helps you discover a medium that has brought so much joy to my life. And of course it is a big plus if you love Christmas!


